Initiation
LAMP (Linux + Apache + MySQL + PHP/Perl/Python) is a bundle of open source software.Advantage of open source-LAMP is the considerable flexibility for different kind of database, web server, and server side scripting languages.We can use PostgreSQL and SQLite instead of MYSQL. Ruby,Perl, and Python are also frequently used instead of PHP. We can use Nginx, Cherokee and Lighttpd instead Apache. In this session, we’ll get a LAMP stack installed on an Ubuntu 16.04 LTS.
Install Linux, Apache, MySQL, PHP LAMP Stack On Ubuntu 16.04
Step 1: Update apt-get package lists and Install Apache
sudo apt-get update
sudo apt-get install apache2
Note: Above command is using “Sudo” keyword.These process get executed with root privileges. It will ask you for your regular user’s password to verify your intentions.
Validate and start apache
sudo service apache2 status
sudo service apache2 start
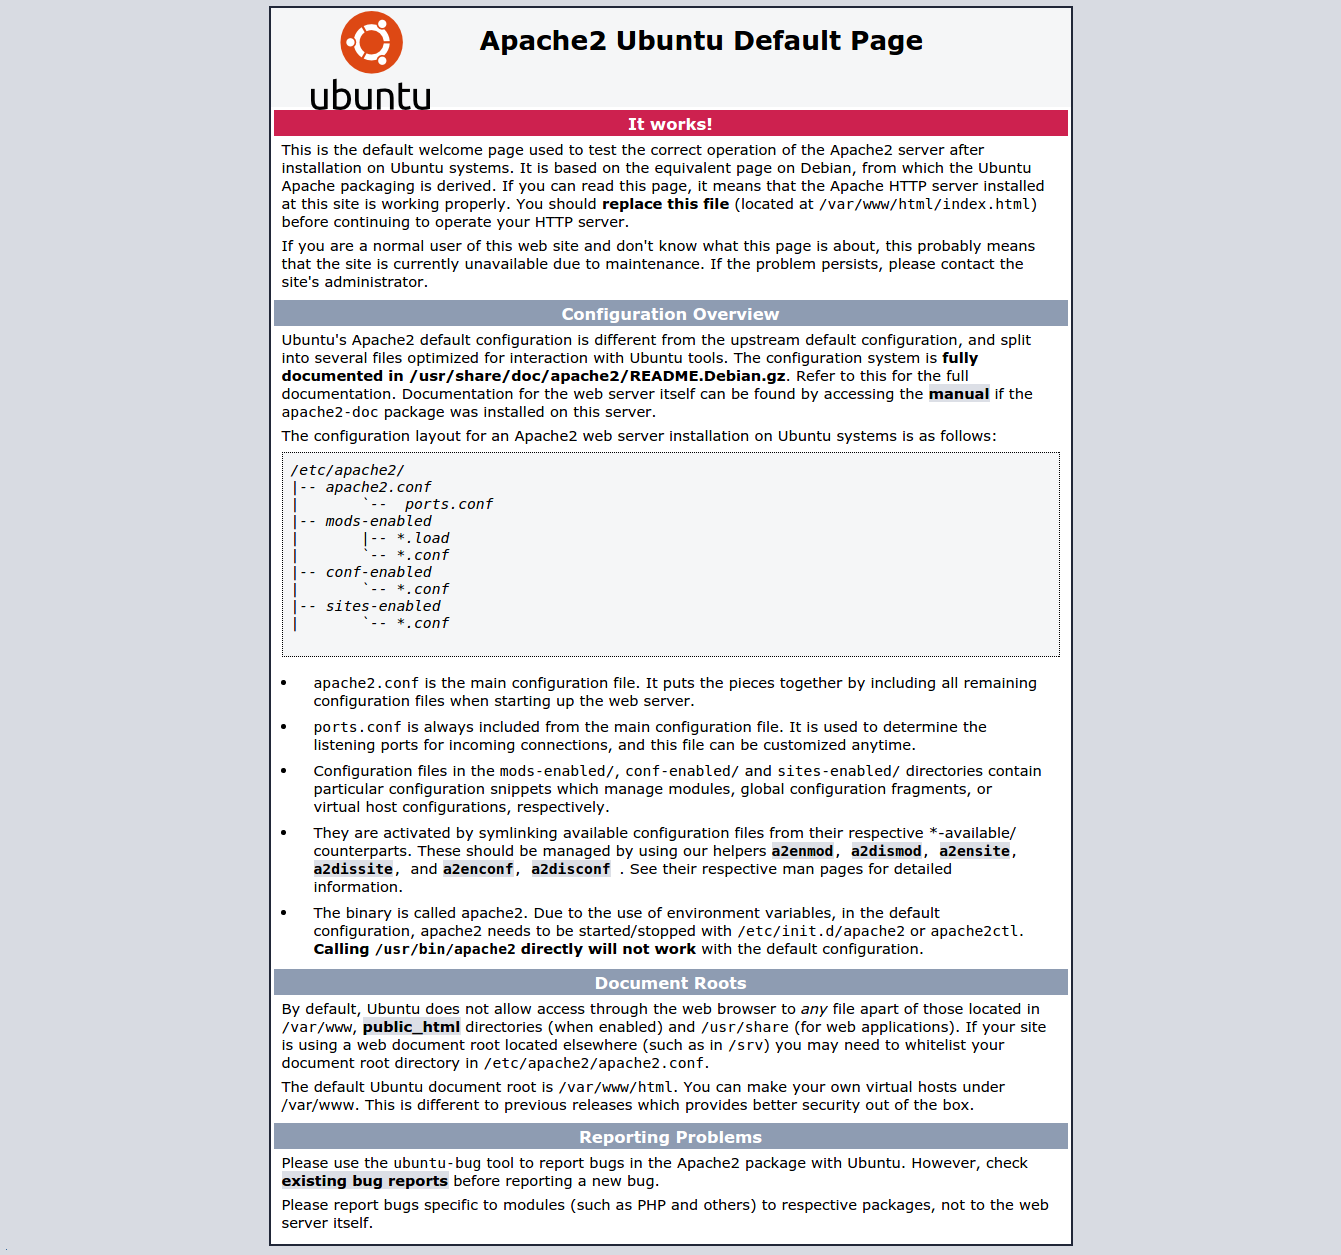
Validate apache installation:
Open your web browser and navigate to http://localhost/ or http://server-ip-address/.
Step 2: Install PHP and add PPA
Ubuntu 16.04 comes with php 7.0, and some php applications might still fail with php 7.0 .Therefore, in some cases, it might be sensible to have both php 7.0 and php 5.x, so that you can choose which version to use for your needs at any time.
To add the PPA to your setup:
sudo apt-get update
sudo add-apt-repository ppa:ondrej/php
Install PHP
sudo apt-get update
sudo apt-get install php7.0 php5.6 php5.6-mysql
sudo apt-get install php-gettext php5.6-mbstring php-xdebug
sudo apt-get install libapache2-mod-php5.6 libapache2-mod-php7.0
sudo apt-get install  php5.6-mcrypt php5.6-curl php5.6-gd php5.6-dom

#Restart Server
sudo service apache2 restart
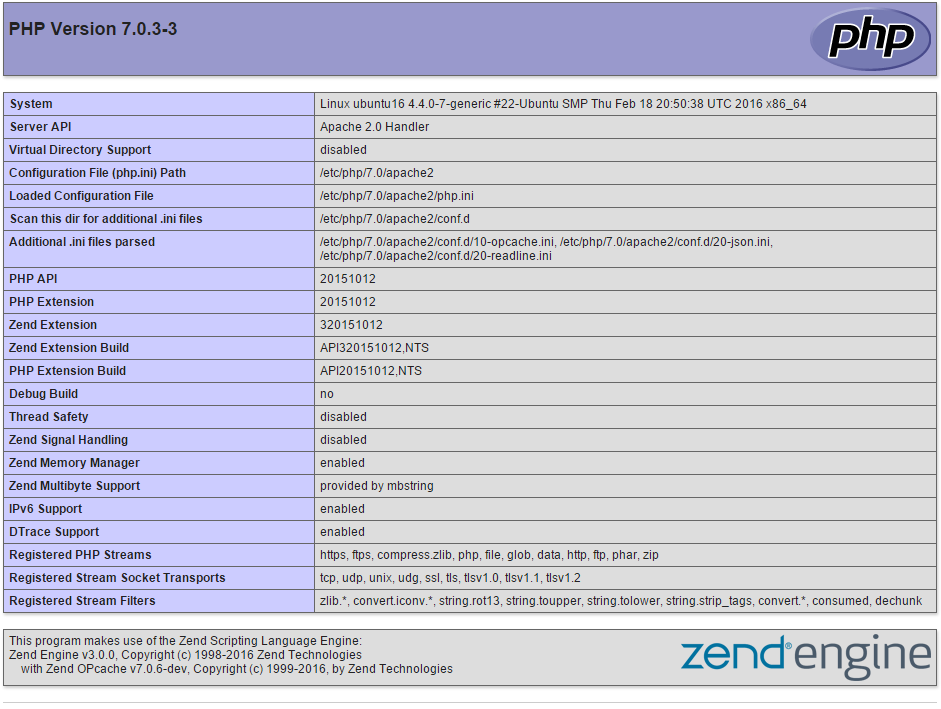
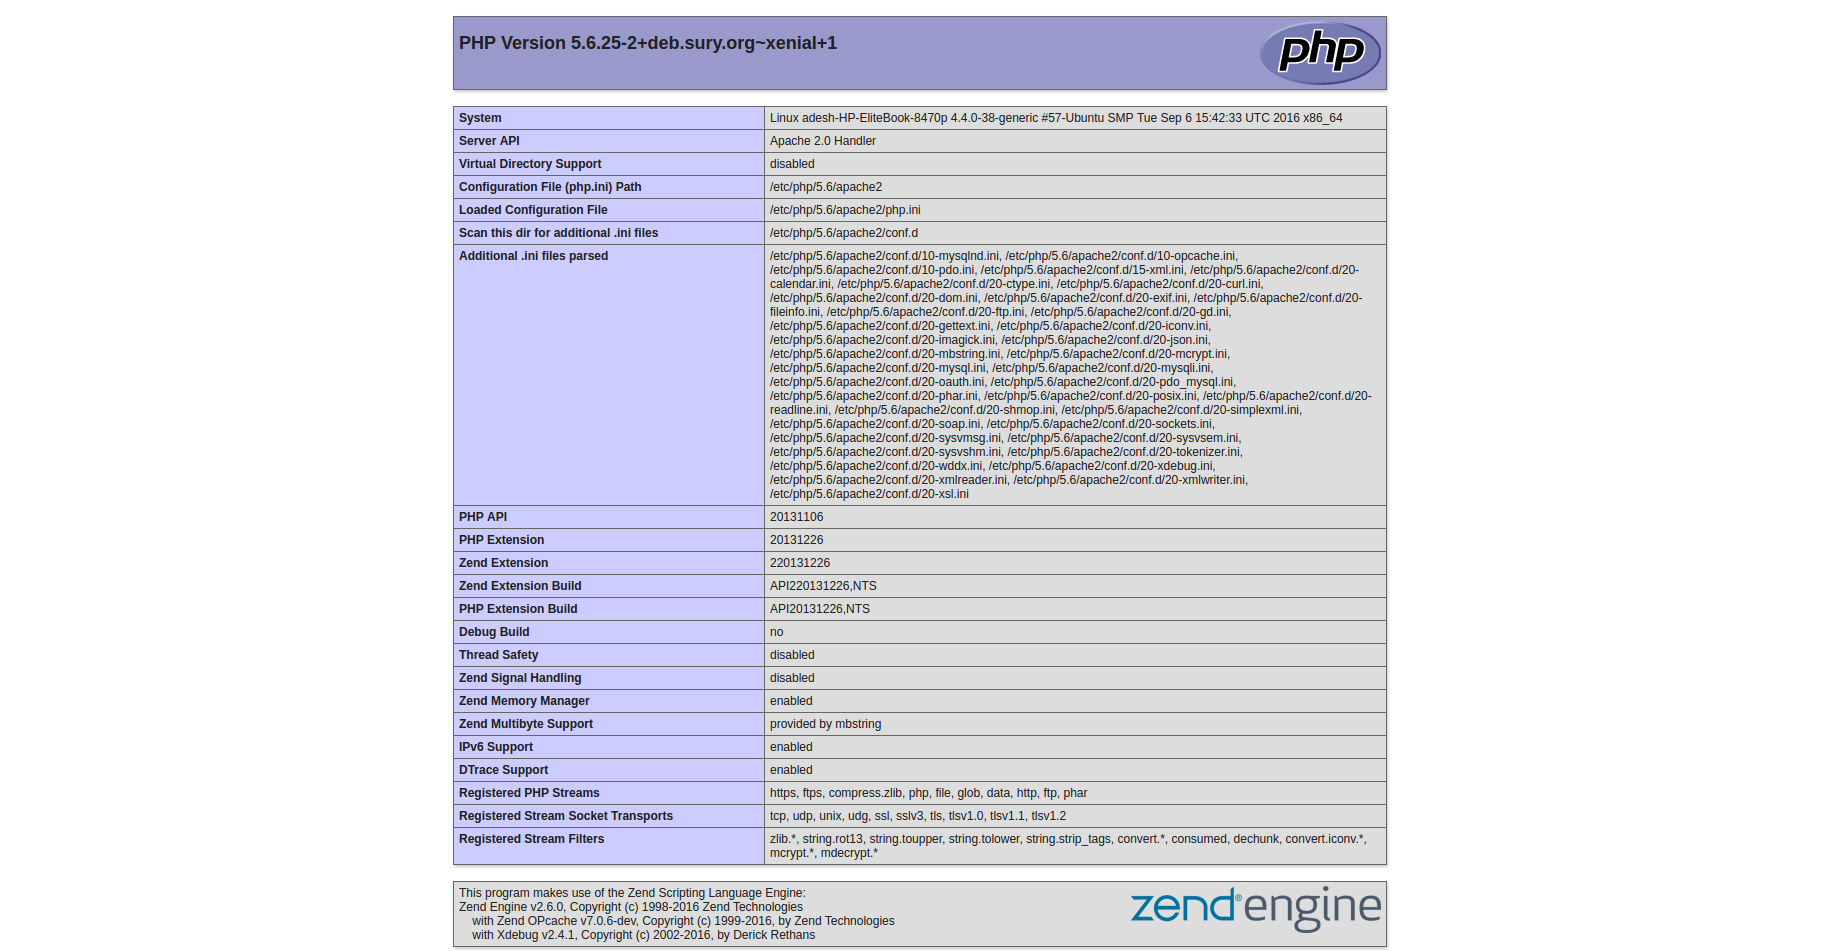
Validate PHP:
Create a test-info PHP file called info.php in /var/www/html/. You can use nano command to create and update the file like below:
nano /var/www/html/info.php
Insert the following code and save and exit:
Ctrl+O and Enter (Save)
Ctrl+X (Exit)
<?php
phpinfo();
?>
You can switch from php 7.0 to php 5.6 and vice versa. you need to do following things:
Switch php5.6 to php 7.0:
# For php in web apps
sudo a2dismod php5.6 && sudo a2enmod php7.0 && sudo service apache2 restart
# For php-cli in the command line
sudo ln -sfn /usr/bin/php7.0 /etc/alternatives/php
Switch php7.0 to php5.6:
# For php in web apps
sudo a2dismod php7.0 && sudo a2enmod php5.6 && sudo service apache2 restart
# For php-cli in the command line
sudo ln -sfn /usr/bin/php5.6 /etc/alternatives/php
Validate current php version :
sudo php -v
Step 3: Install MySQL
Install the mysql-server package and choose a secure password when prompted:
sudo apt-get update
sudo apt-get install mysql-server

# You can install mysql client too
sudo apt-get install mysql-client
During the install, it will prompt you to enter a MySQL root password. Set any password that you would like. It should be a strong password.
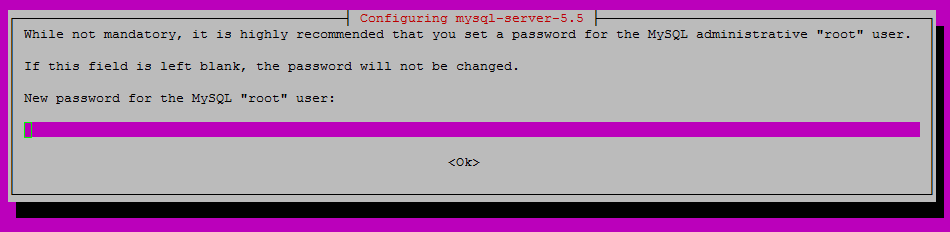
After you enter your MySQL root password, you will need to re-enter it.

Validate the MySQL is running with the following command:
sudo service mysql status
#Restart if necessary
sudo service mysql restart
Step 4: Install PhpMyAdmin (Optional)
phpMyAdmin is a tool by which you can manage your MySQL databases. phpMyAdmin is released under GNU General Public License, version 2.
So can install it with below command:
sudo apt-get update
sudo apt-get install phpmyadmin
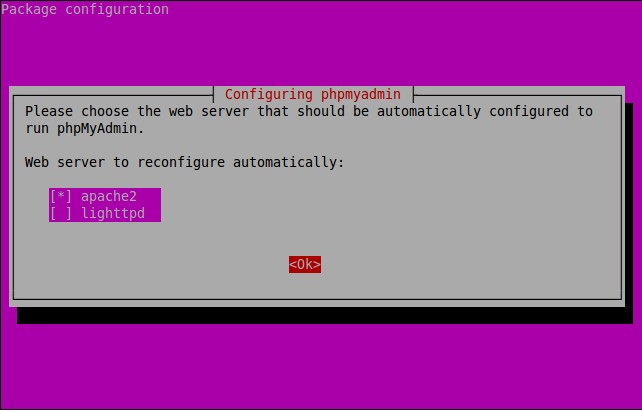
Select the apache2 as Web server that should be automatically configured to run phpMyAdmin.
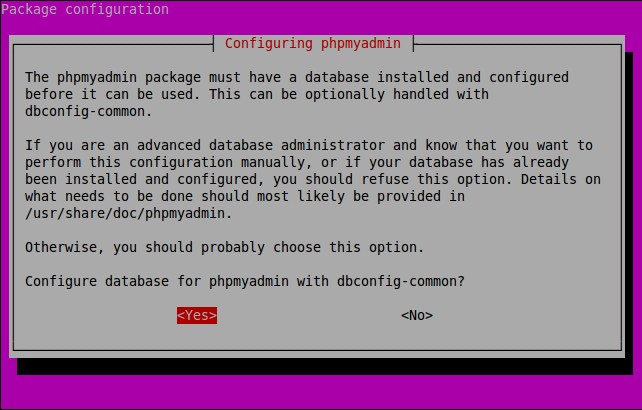
You can select “Yes” as default (dbconfig-common) configuration for phpmyadmin.
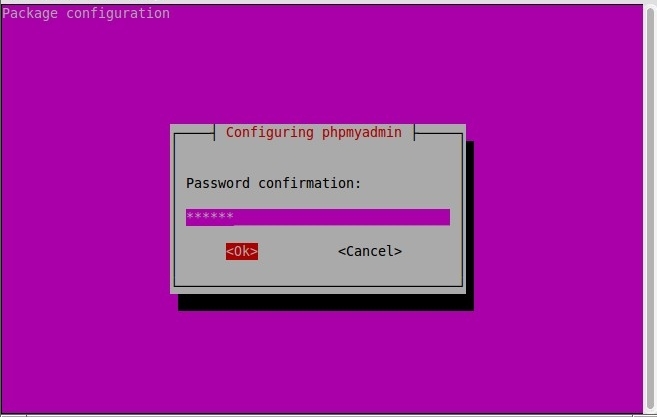
Enter password of the database administrative user.

Enter MySQL application password for phpmyadmin:

Re-enter password:
phpMyAdmin installation is done.
Update the apache configuration in case phpMyAdmin is not working, please do the following steps.
Open terminal, and type:
sudo nano /etc/apache2/apache2.conf
Insert the following line at the end then save and exit:
Ctrl+O and Enter (Save)
Ctrl+X (Exit)
Include /etc/phpmyadmin/apache.conf
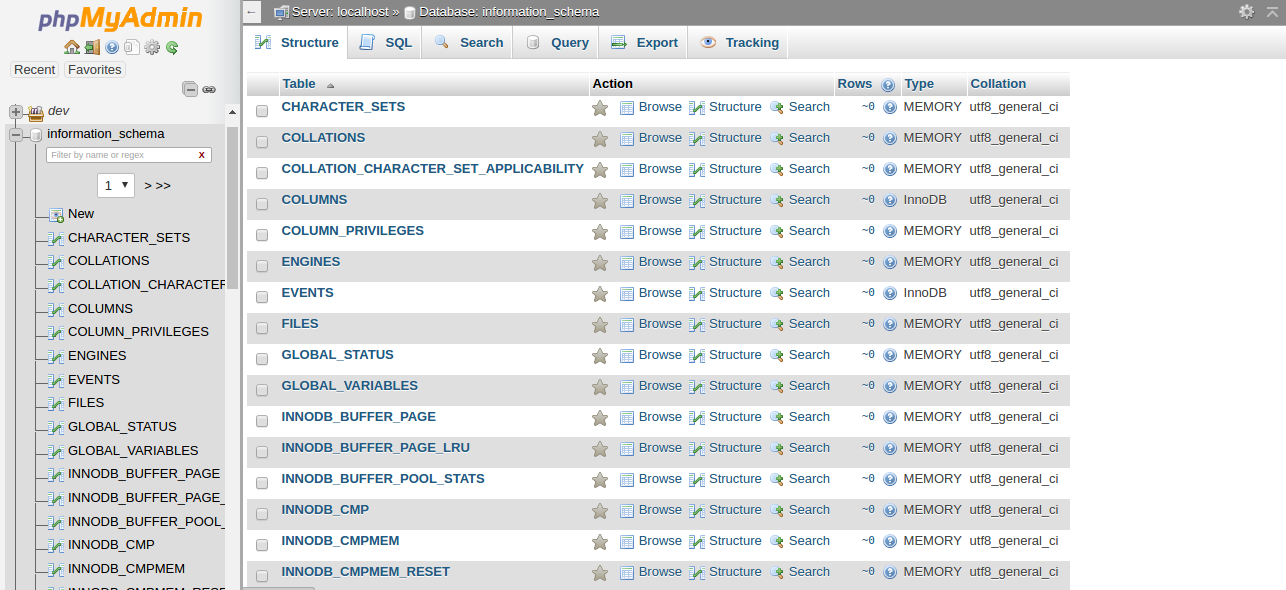
Validate the phpMyAdmin :
Open your web browser and navigate to http://localhost/phpmyadmin or http://server-ip-address/phpmyadmin
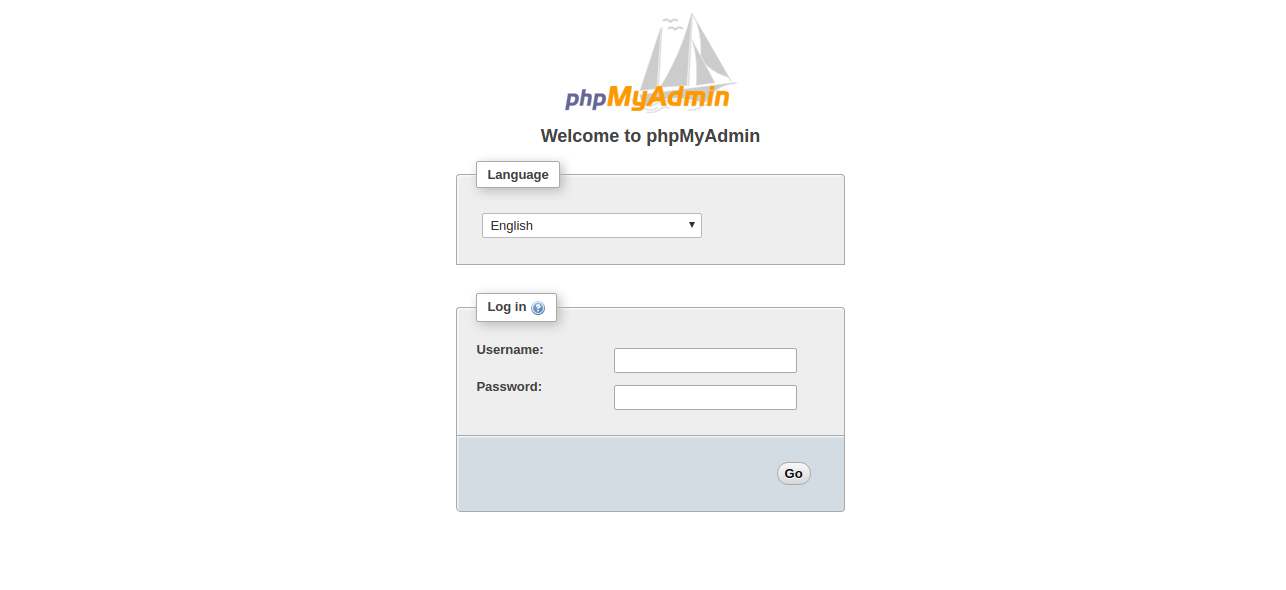
Enter your MySQL username and password which you have given in previous steps.Then You will be redirected to PhpMyAdmin main web interface.
That’s it. Your LAMP with Apache 2.4, PHP 7 and PHP 5.6 stack is ready to use.